XV Lidar Controller v1.1
Parts List
- 1 x PCB
- 1 x 1K Resistor
- 1 x Schotchy Diode
- 1 x 2 Pin JST connector 2.0mm
- 1 x 4 pin JST connector 2.0mm
- 1 x Mosfet
- 2 x 1×12 female header 2.54mm
- 2 x 1×12 male header 2.54mm
- 1 x Teensy 2.0
Assembly
The following steps assume you have basic soldering skills.
Step 1 – Resistor
![]() Start with the resistor. It is non-directional so insert it in the holes marked R1.
Start with the resistor. It is non-directional so insert it in the holes marked R1.
Step 2 – Diode
![]() Next insert the diode matching the stripe to the image.
Next insert the diode matching the stripe to the image.
Step 3 – Motor Plug
![]() Insert the 2 pin JST connector to the Motor label with the opening matching the notch in the image (facing inward).
Insert the 2 pin JST connector to the Motor label with the opening matching the notch in the image (facing inward).
Step 4 – Serial Plug
![]() Insert the 4 pin JST connector to the Serial label with the opening matching the notch in the image (facing inward).
Insert the 4 pin JST connector to the Serial label with the opening matching the notch in the image (facing inward).
Step 5 – Female Headers
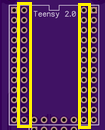
 Attach the female headers to the inside row and solder. This is where the Teensy will mount. Using the female headers allows the easy removal and or replacement of the Teensy. Alternatively you could permanently mount the Teensy to the board with the male headers.
Step 6 – Mosfet
![]() When looking at the front of this particular Mosfet the Gate pin is the first pin on the left. The PCB is labeled with GDS. The Mosfet should be facing outward.
When looking at the front of this particular Mosfet the Gate pin is the first pin on the left. The PCB is labeled with GDS. The Mosfet should be facing outward.
